
Step 1. Setting Up the R365 OData Connector User
To sync your Journal Entry location codes and chart of accounts, you’ll need to create an OData Connector User in R365.
1. Steps to Create the User:
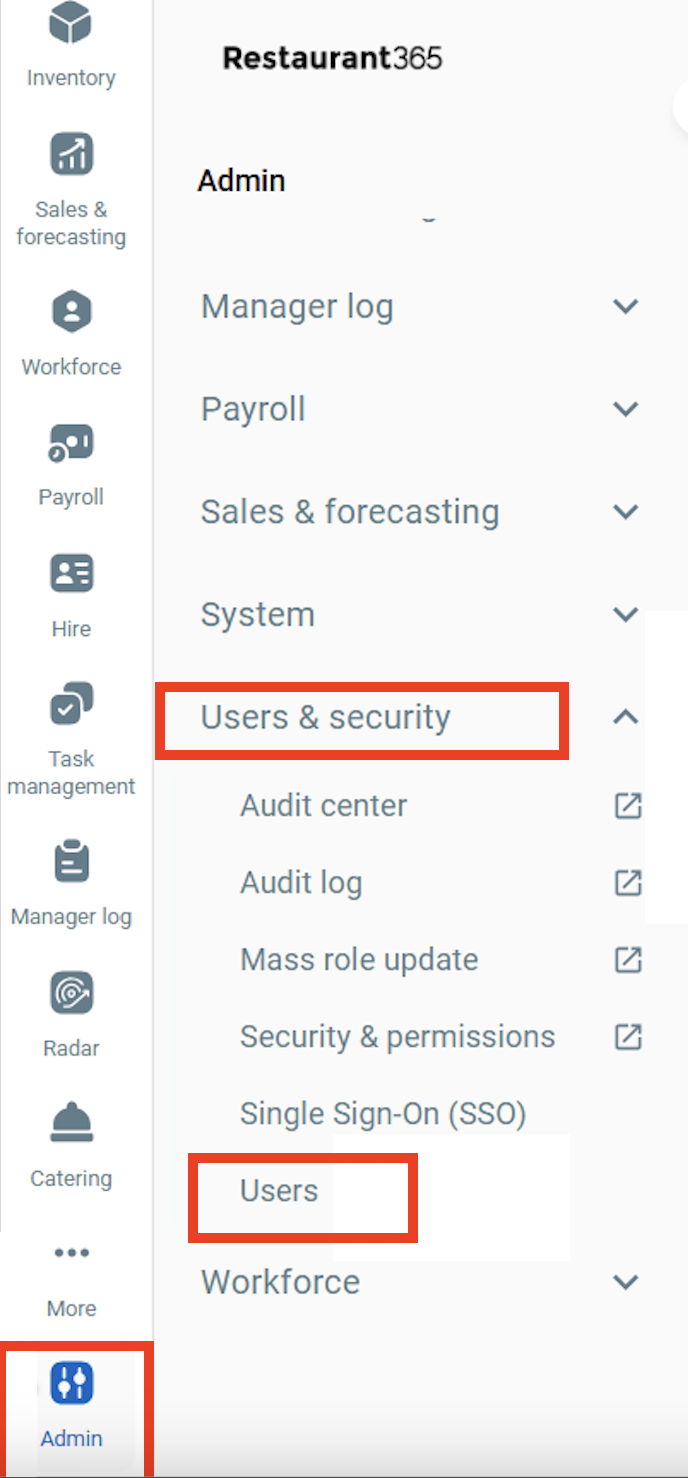
Log in to your R365 account and navigate to Admin and expand the Users and Security Category and select Users
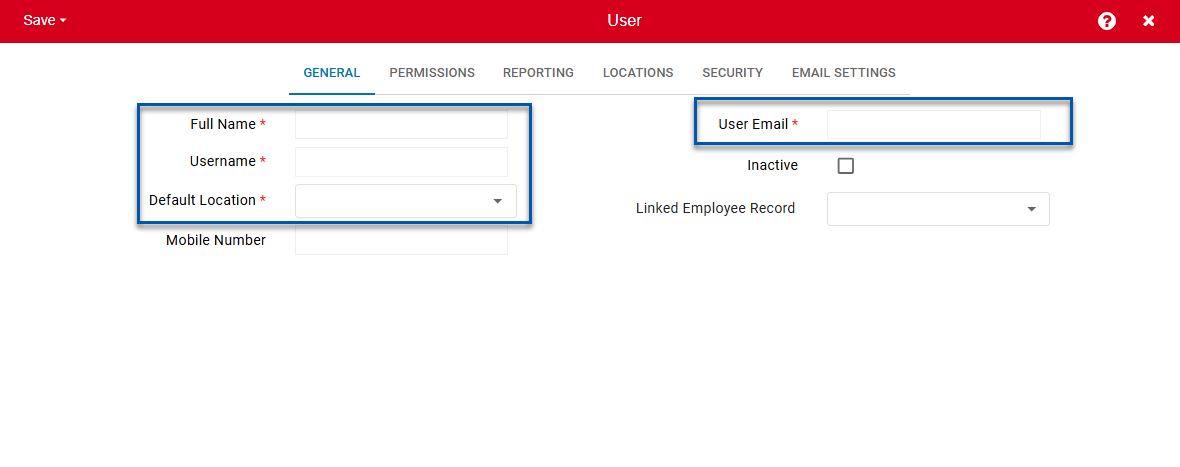
To add a new user, click on Add User at the top right corner.
Enter the user details:
- Full Name: Loop Integration
- Username: loop
- Default Location: Choose any default location; the default location is used throughout the system and reflects the user’s primary location.
- User Email: Use the email address shared by the Loop team

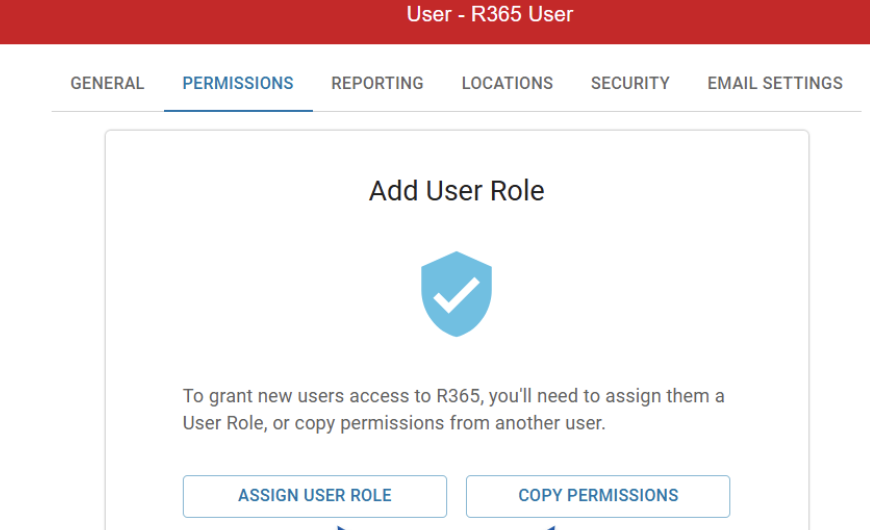
2. Assign User Roles:
- Go to the 'Permissions' tab within the User Record
- Click 'Assign User Role'
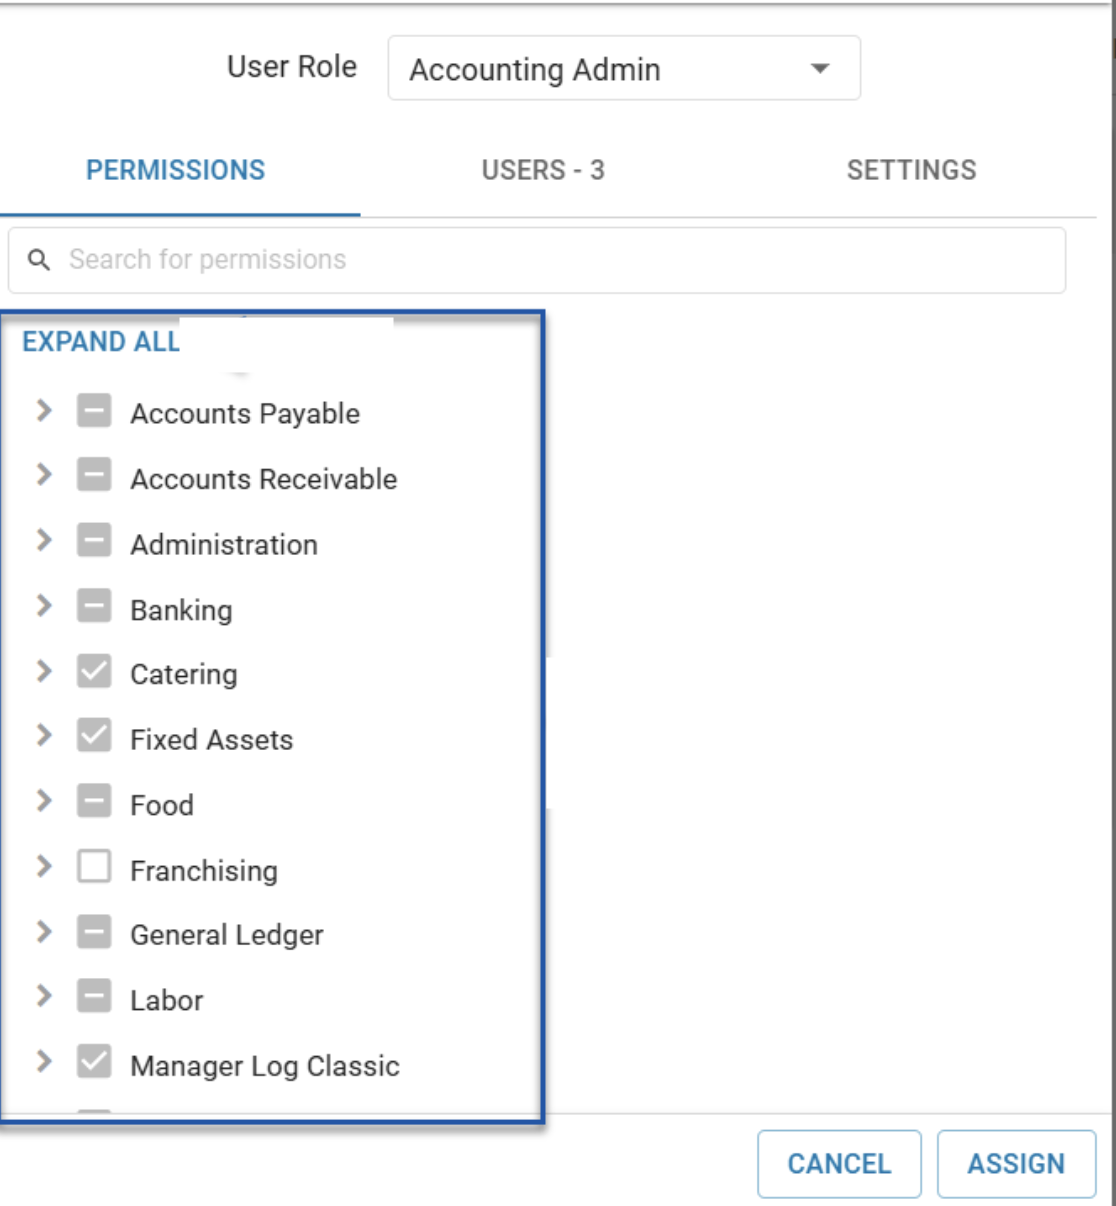
- Assign Accounting Admin
- Assign all Rights and Click ASSIGN


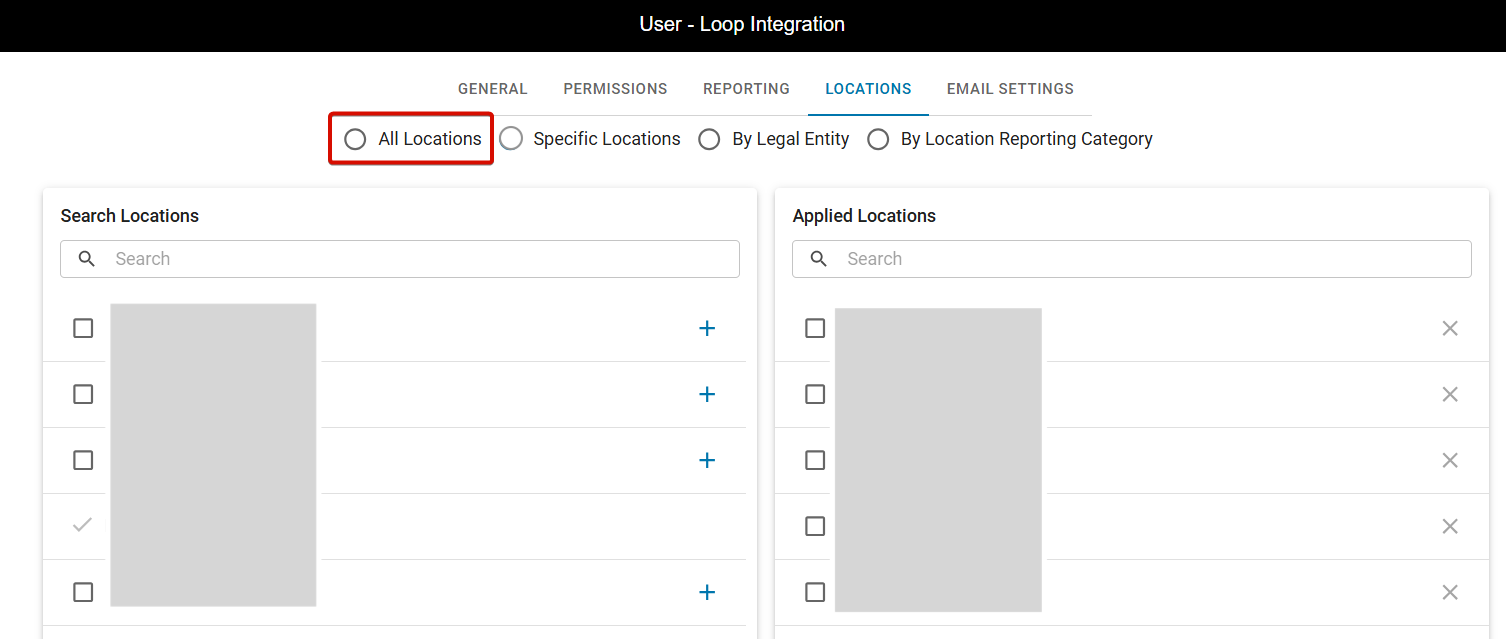
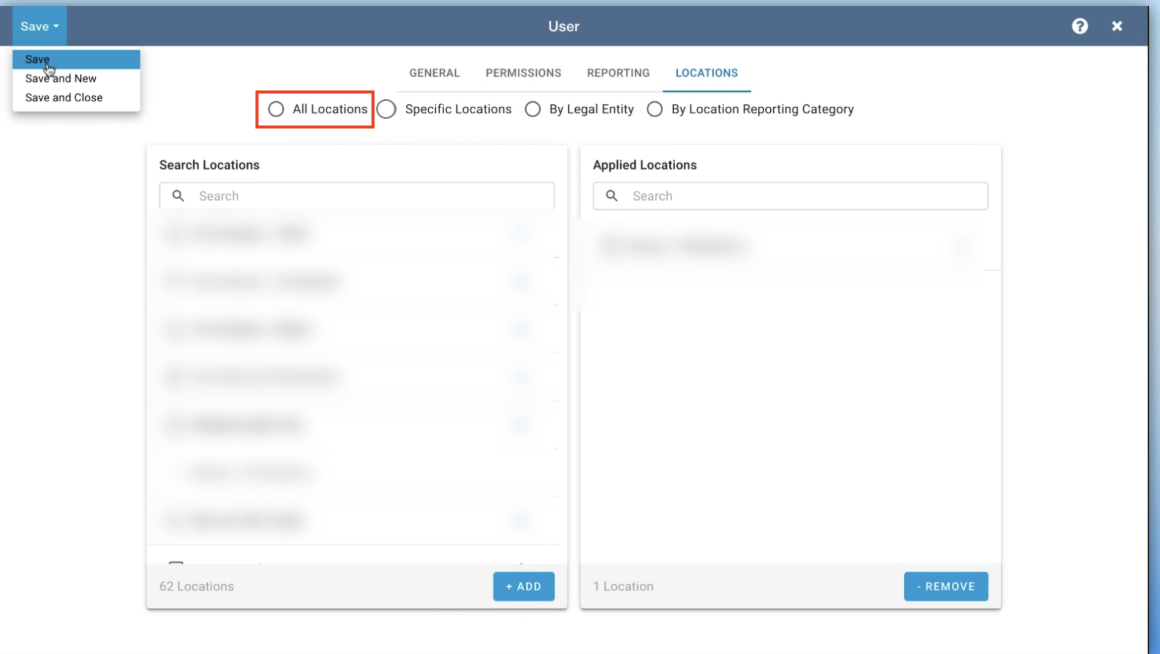
3. Set Location Access:
Under the “Locations” tab within the User Record, grant the user access to all locations in R365 to ensure comprehensive syncing.
4. Save the User Record: Now click 'Save and Close' on the top left to create the new user, and after the user record is saved, an email is sent to the address listed on the General tab, prompting the user to create a password.
Step 2. Enabling Automated Journal Entry Push via API Access
To allow LoopAI to automatically push Journal Entries into R365, API access must be configured.
Steps to Request API Access:
1. Contact R365 Support:
Email R365 Support at support@restaurant365.com to request API access to write for LoopAI integration. Alternatively, you can raise a support request as well from their help centre.
Include the LoopAI support team (support@loopai.xyz) in the CC field to keep all parties informed.
2. Await Confirmation:
R365 Support will review your request and will confirm that LoopAI has been given API access to write in your R365 database.
Note: The API access enables LoopAI to push data directly into your R365 account, ensuring real-time data synchronization.
Step 3. Completing the Setup in Loop Dashboard
After R365 user setup and API write access confirmation, your Loop POC will get in touch to finalize the integration within the LoopAI platform.
Steps to Complete the Setup:
1. Log in to LoopAI: Use your username and password to log in to the Loop platform.
2. Navigate to Software integration: Navigate to Balance --> Journal Entry Automation --> Journal Settings
3. Select Map Locations
 Select all the locations in Loop that you want to map to your connected R365 account. Note: Journal Entries will be generated for the mapped locations.
4. Map Locations: Map each location on Loop to the corresponding JE Location entity in R365 from the drop-down list.

Once all locations are mapped, click “Save” to finalize the setup.
5. Configure Chart of Accounts & Journal Type
To learn more about mapping your Chart of Accounts, refer to this guide.
Need Assistance?
If you have any questions or require further assistance during the integration process, please reach out to us at support@tryloop.ai.