
- Step 1: Create a user for Loop on Toast
- Step 2: Enable Automated Nightly Data Exports
Before You Start
To create or edit jobs and users in Toast Web, you need:| Requirement | Details |
|---|---|
| Manager-level Toast Web access | 8.2 User Permissions permission. You also need every permission you intend to assign to a job — you cannot grant a permission you do not have yourself. |
| Loop access email | We'll use the same email linked to your marketplace access for your Toast login. |
| ~5 minutes | Quick setup — no downtime for your POS. |
Step 1: Create a User for Loop on Toast
Setting up the Loop user involves two parts — first creating a Job (the role and its permissions), then creating the Employee profile.
Create a JobThe Job defines what the Loop user can see and do. You only need to do this once.
- Log in to Toast Web at https://toasttab.com.
- Navigate to Team > Settings > Jobs.
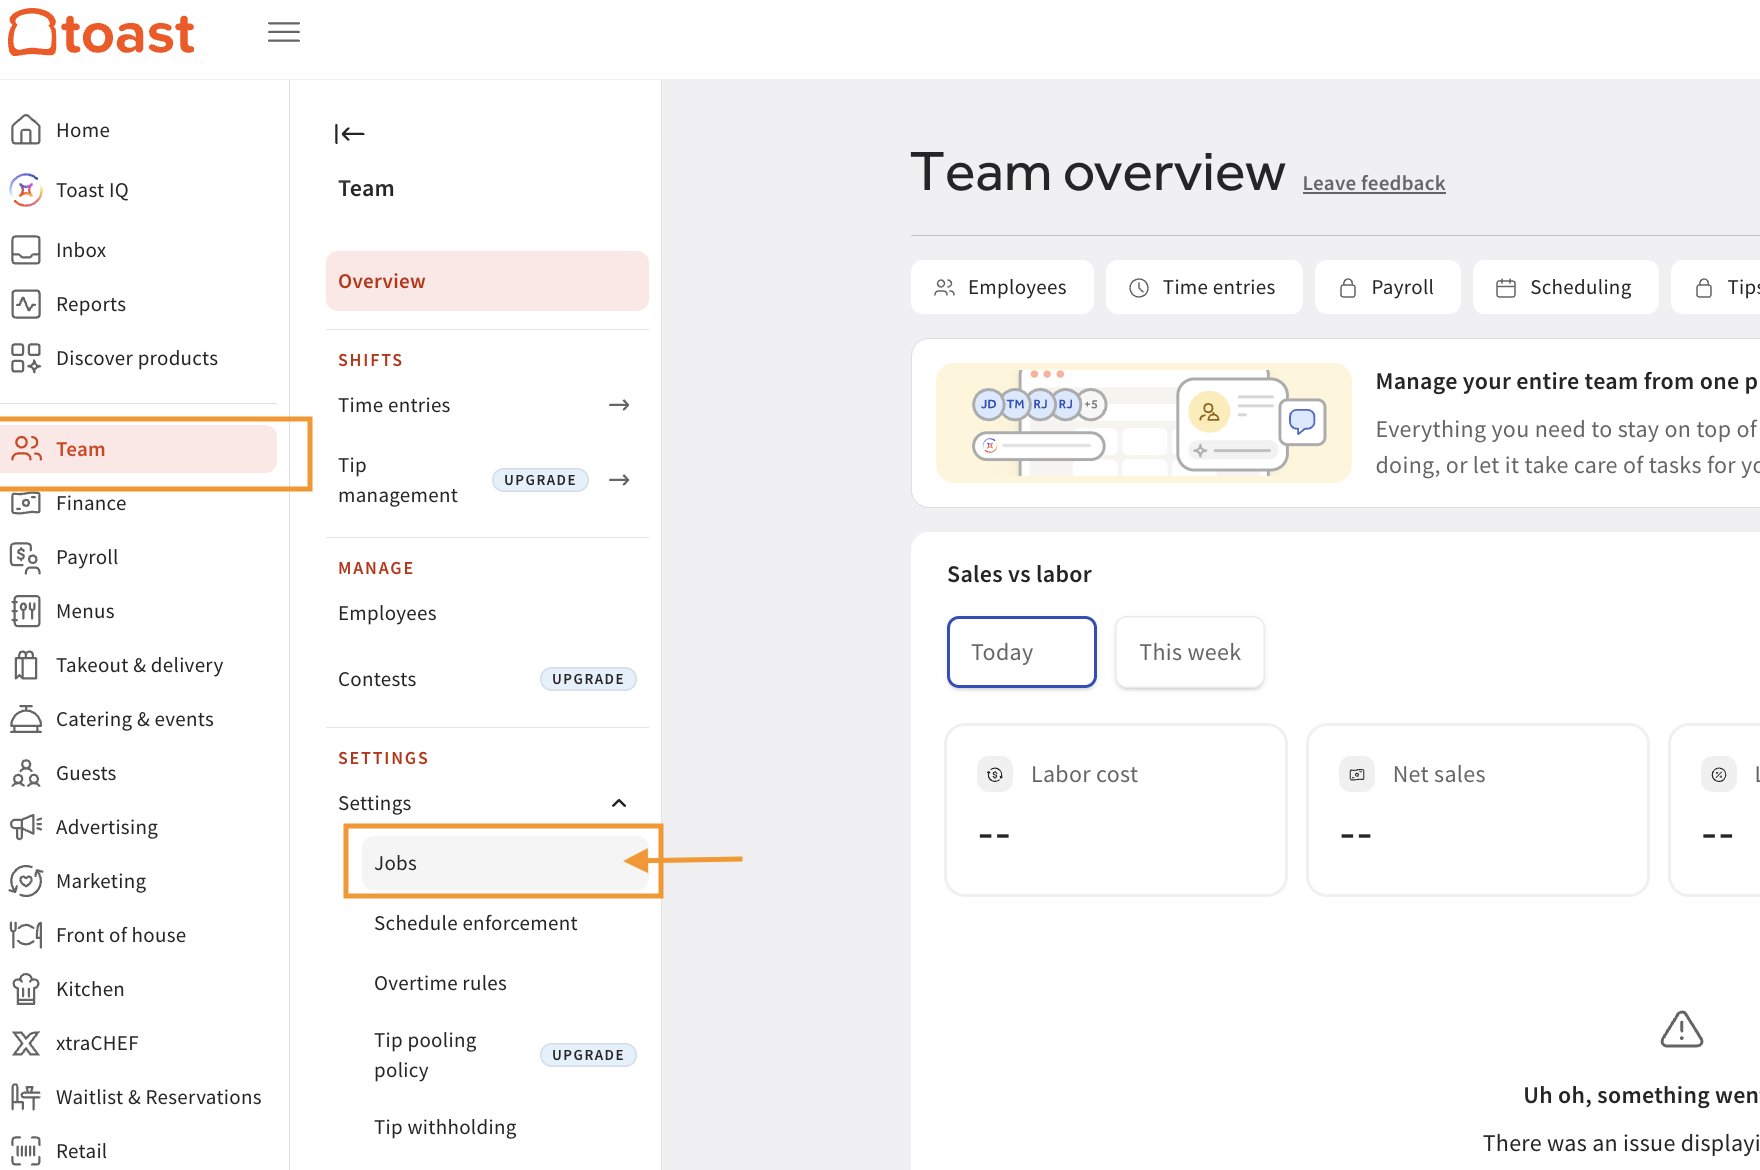
- Select + Add Job > Create New Job.
- On the first page:
- In the Job details section, if you have more than one location, you can pick which locations the job should be created in under Where does this job apply?.
- Set the Job title to
External Accountant(orLoop— either works). - Job Code:
External Accountant(orLoop— either works) - Select Continue to open the Permissions page.
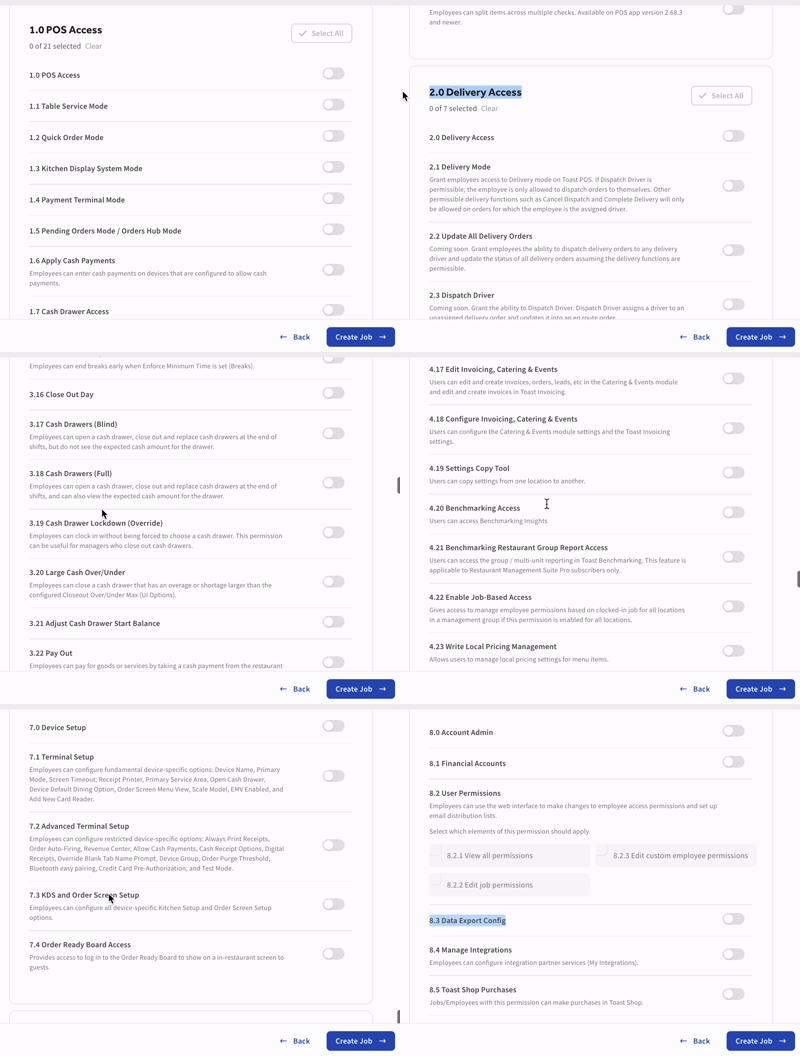
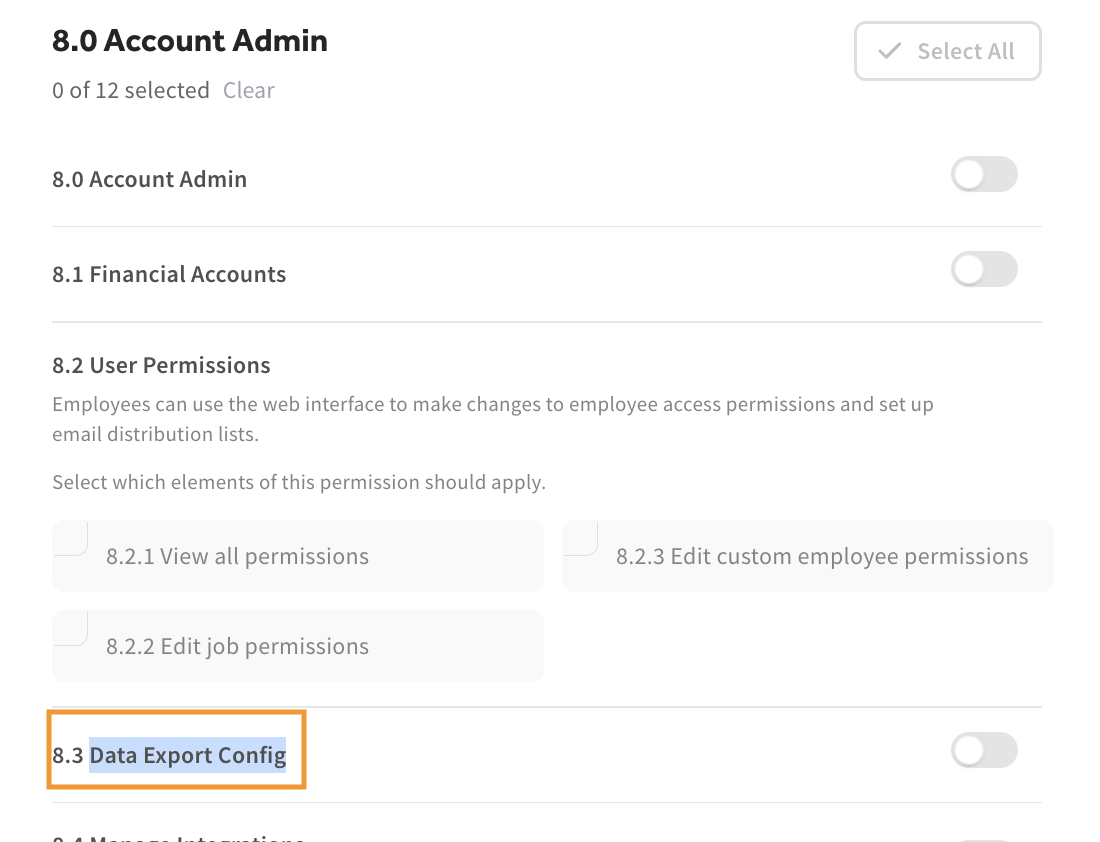
Enable all permissions in sections 1 through 6, along with permission 8.3 Data Export Config:
- i.e.
- 1. POS Access
- 2. Delivery Access
- 3. Manager
- 4. Restaurant Admin
- 5. Quick Edit Access
- 6. Web Setup
- 8.3 Data Export Config under Account Admin
- Select Create Job.
- Note: Toast may send a one-time verification code to your phone when saving a job with sensitive permissions. Enter the code when prompted to proceed. Permission 8.3 Data Export Config is required to configure Automated Nightly Data Exports.
Create the Employee Profile:
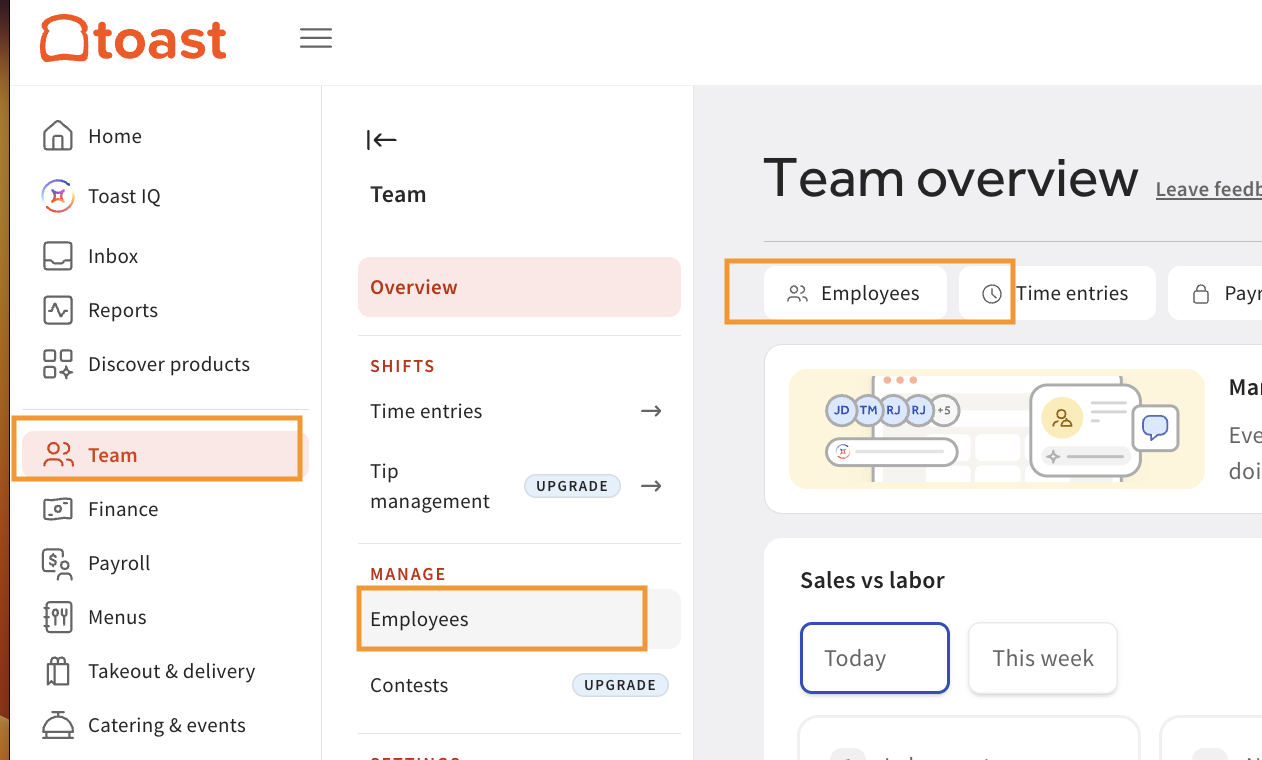
- Navigate to Team > Employees (under Manage or in Team overview)
- Select +Add New Employee.
- Fill in the employee details:
- First Name: Loop
- Last Name: User
- Chosen Name: e.g.
Loop User - Email: The same email used for your marketplace (e.g. Uber Eats, DoorDash) access — Loop will share this for Toast login too.
- POS Access: You can leave it blank
- Under Jobs, select the External Accountant job you created in Part 1.
- Make sure Invite to create account is toggled to Yes on top — this sends the user a secure link to set up their Toast Web login.
- Click Add.
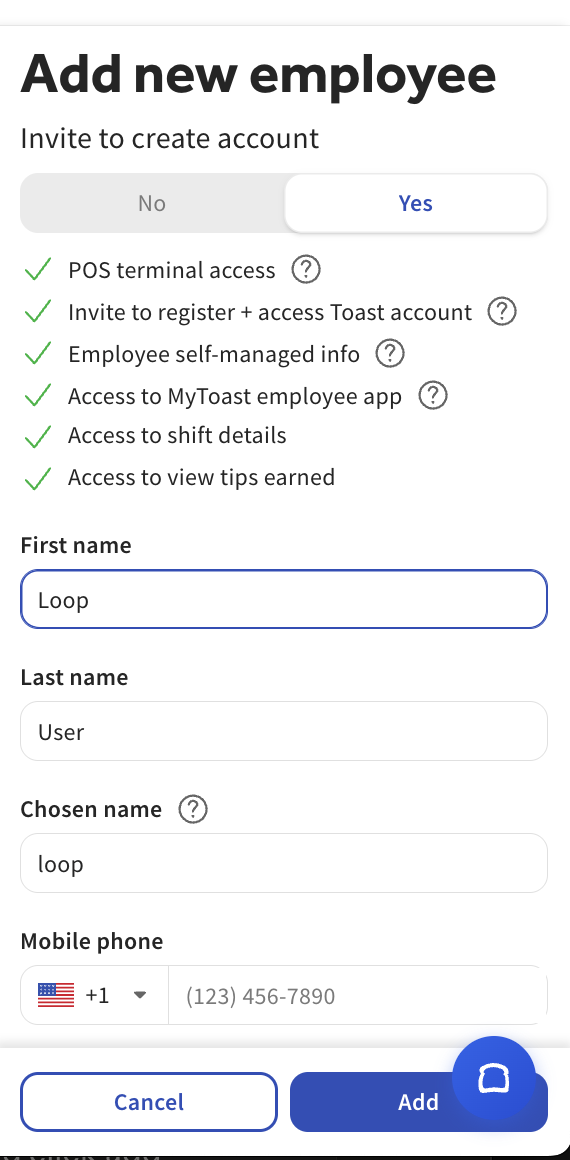
Toast will send an invitation email to the address provided. The team at Loop will accept the invite to activate their account.
Step 2: Enable Automated Nightly Data Exports:Toast’s Automated Nightly Data Exports allow Loop to securely retrieve your restaurant’s data each day through secure SFTP at no additional charge. To enable it:
- In your Toast admin settings, turn on the Automated Nightly Data Export. The Data Exports configuration page will be visible via Reports > Settings > Data Exports. restaurant group. Only users with the 8.3 Data Export Config permission can modify the data export setup for your restaurant group. If the Data Exports page is unavailable or displays a setup message, contact Toast Customer Care and ask them to enable Automated Nightly Data Exports for your
- Include all available datasets - specifically: sales & orders, payments/refunds/voids, menu & modifiers, labour (time entries, schedules), and accounting & cash
Once the exports are enabled, Loop will configure the SSH key using the Loop login account created in Step 1. Nothing further is required from you—your nightly Toast data will begin flowing securely into Loop.
- Reference: Toast's help article for reference