
To enable NetSuite integration with Loop for automated journal entry posting, you'll need to set up OAuth 2.0 authentication on your NetSuite account. This is a one-time setup that takes about 10–15 minutes.
To complete the setup, we need the following details from your NetSuite account:
- Account ID
- Client ID — from the Integration Record
- Certificate ID — from the OAuth 2.0 Client Credentials setup
This guide walks you through generating these details and completing the integration in Loop.
Prerequisites
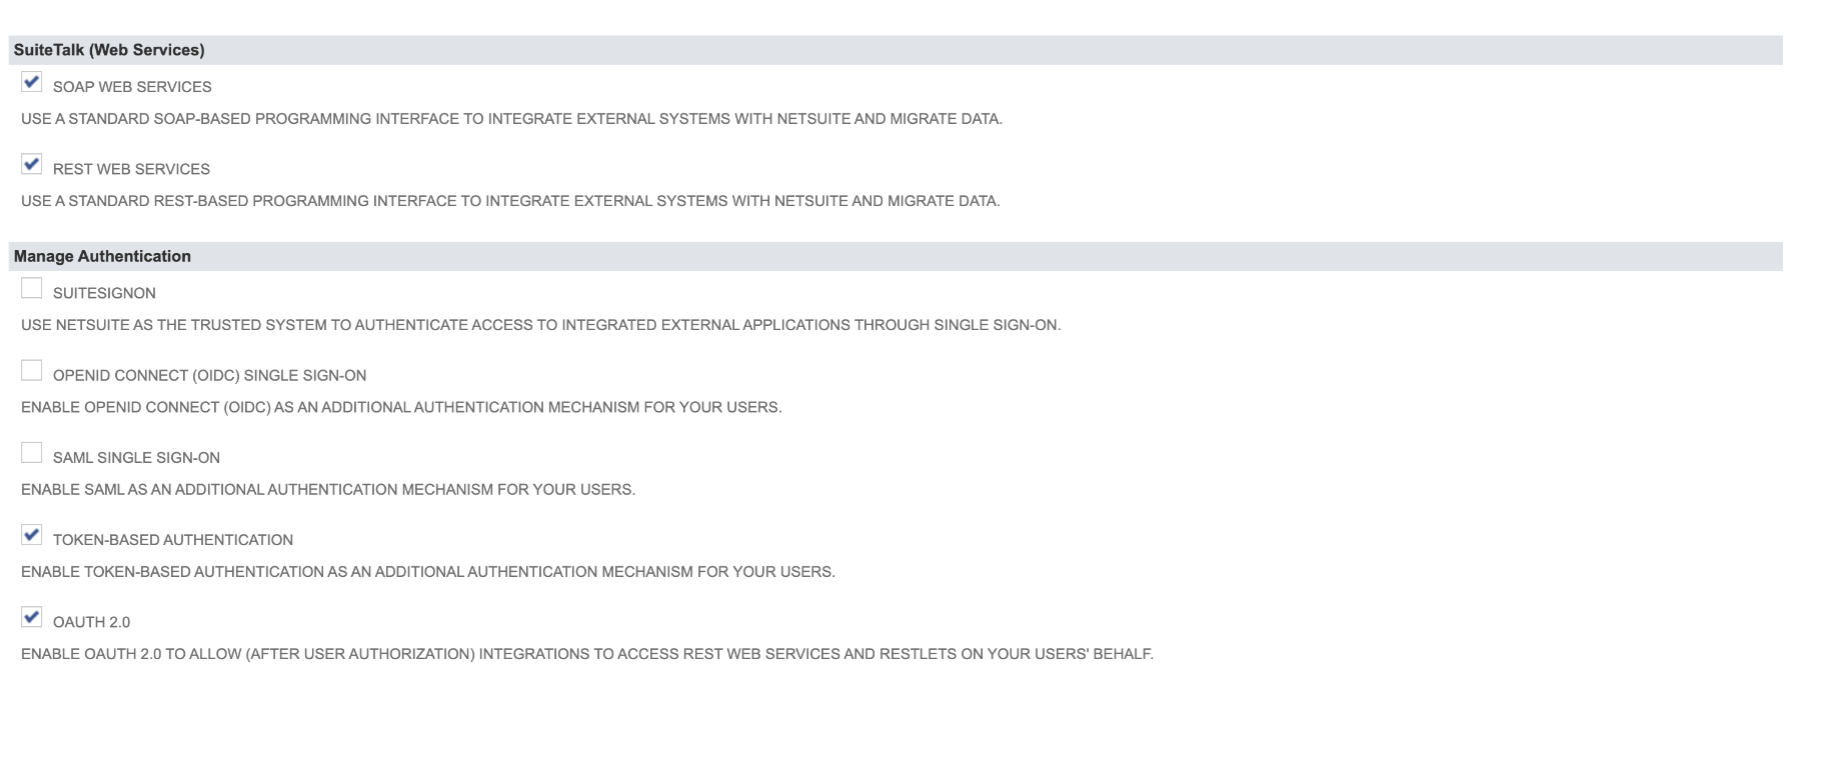
Before you begin, make sure the following features are enabled in your NetSuite account:
- Log in to NetSuite as Administrator
- Go to Setup → Company → Enable Features
- Click the SuiteCloud tab
- Under SuiteTalk (Web Services), check REST Web Services
- Under Manage Authentication, check OAuth 2.0
- Click Save
Generating Details on the NetSuite Application
Step 1: Copy Your Account ID
- Go to Setup → Company → Company Information
- Copy the Account ID (e.g.
1234567orTSTDRV1234567)

Step 2: Create an Integration Record
- In NetSuite, go to Setup → Integration → Manage Integrations → New
- In the Name field, enter a name for this integration, e.g.
Loop OAuth2 - On the Authentication tab:
- Under Token-based Authentication — leave it unchecked
- Under OAuth 2.0 — check Client Credentials (Machine to Machine) Grant
- Under Scope — check REST Web Services
- Click Save
- The Client ID will be displayed. Copy it and save it somewhere safe.
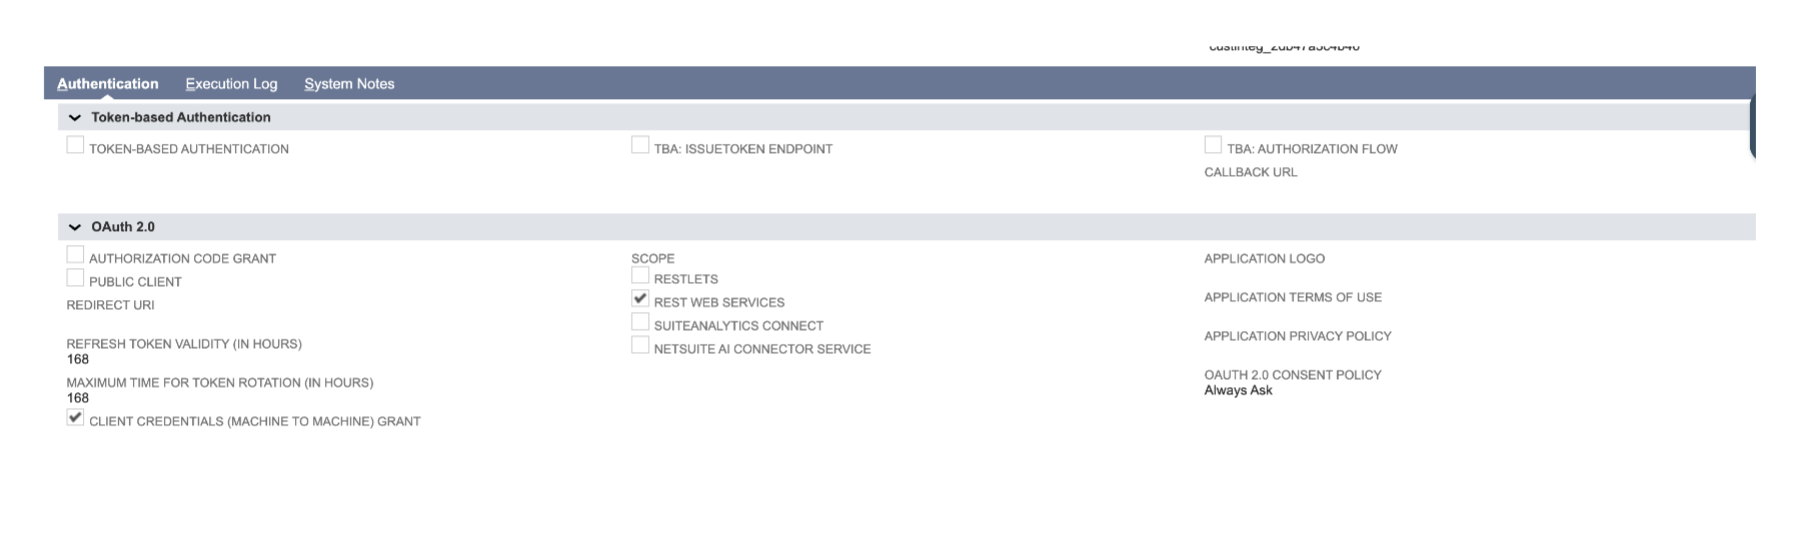
Important: The Client ID is shown only once when you save. Make sure to copy it before navigating away. If you lose it, you'll need to click Edit and reset the credentials.
Step 3: Create a Role for Loop
- Go to Setup → Users/Roles → Manage Roles → New
- Enter a name, e.g.
Loop OAuth2 Role - Under Subsidiary Restrictions, select All for Accessible Subsidiaries
- Under Authentication, leave Web Services Only Role unchecked
- Go to the Permissions tab and add the following:
 Reports tab:
 Lists tab:
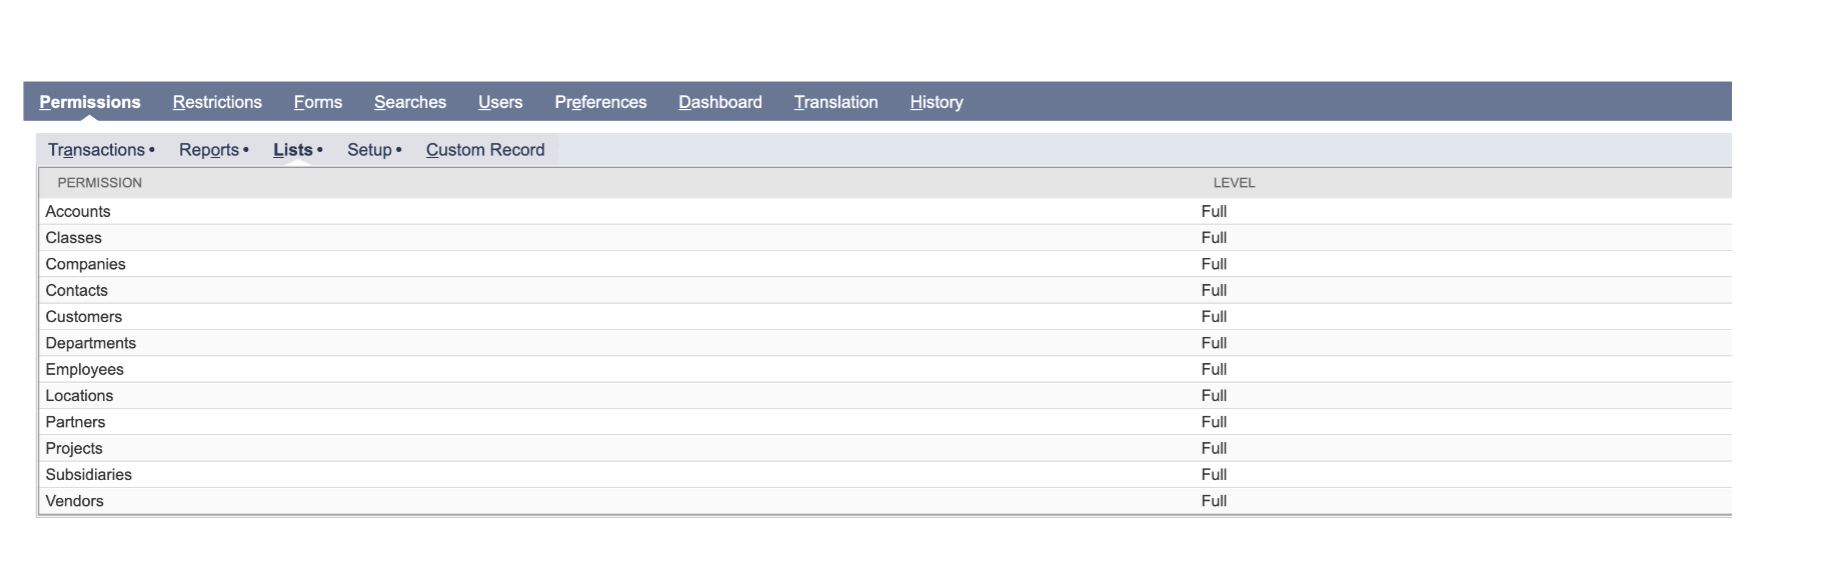 Setup tab:
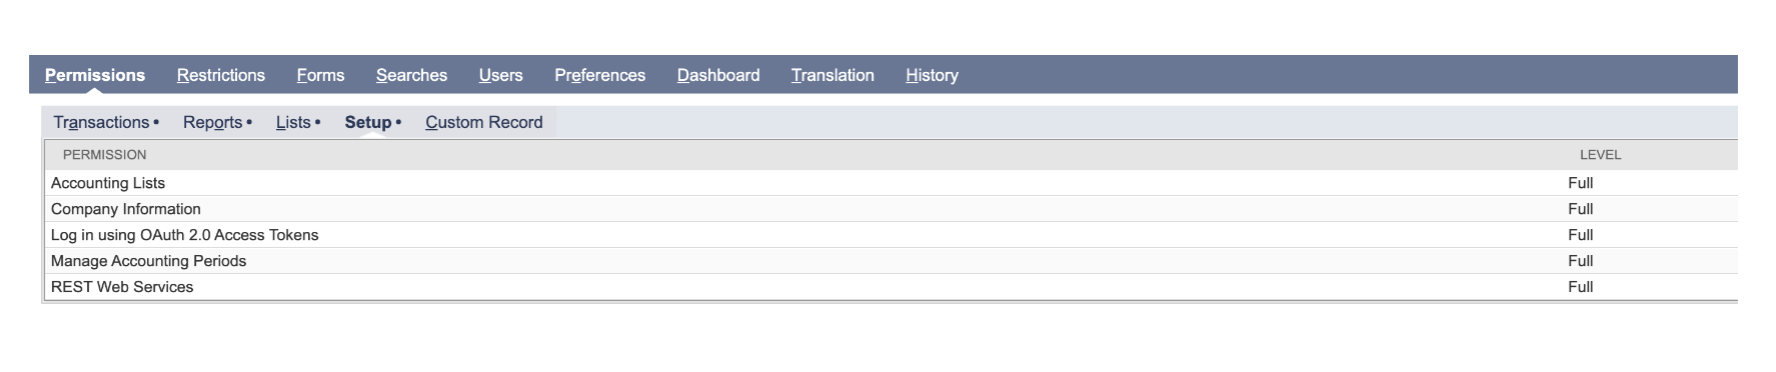 6. Click Save
Step 4: Create a User for Loop
It is recommended that you create a dedicated user for the Loop integration instead of using an existing one.
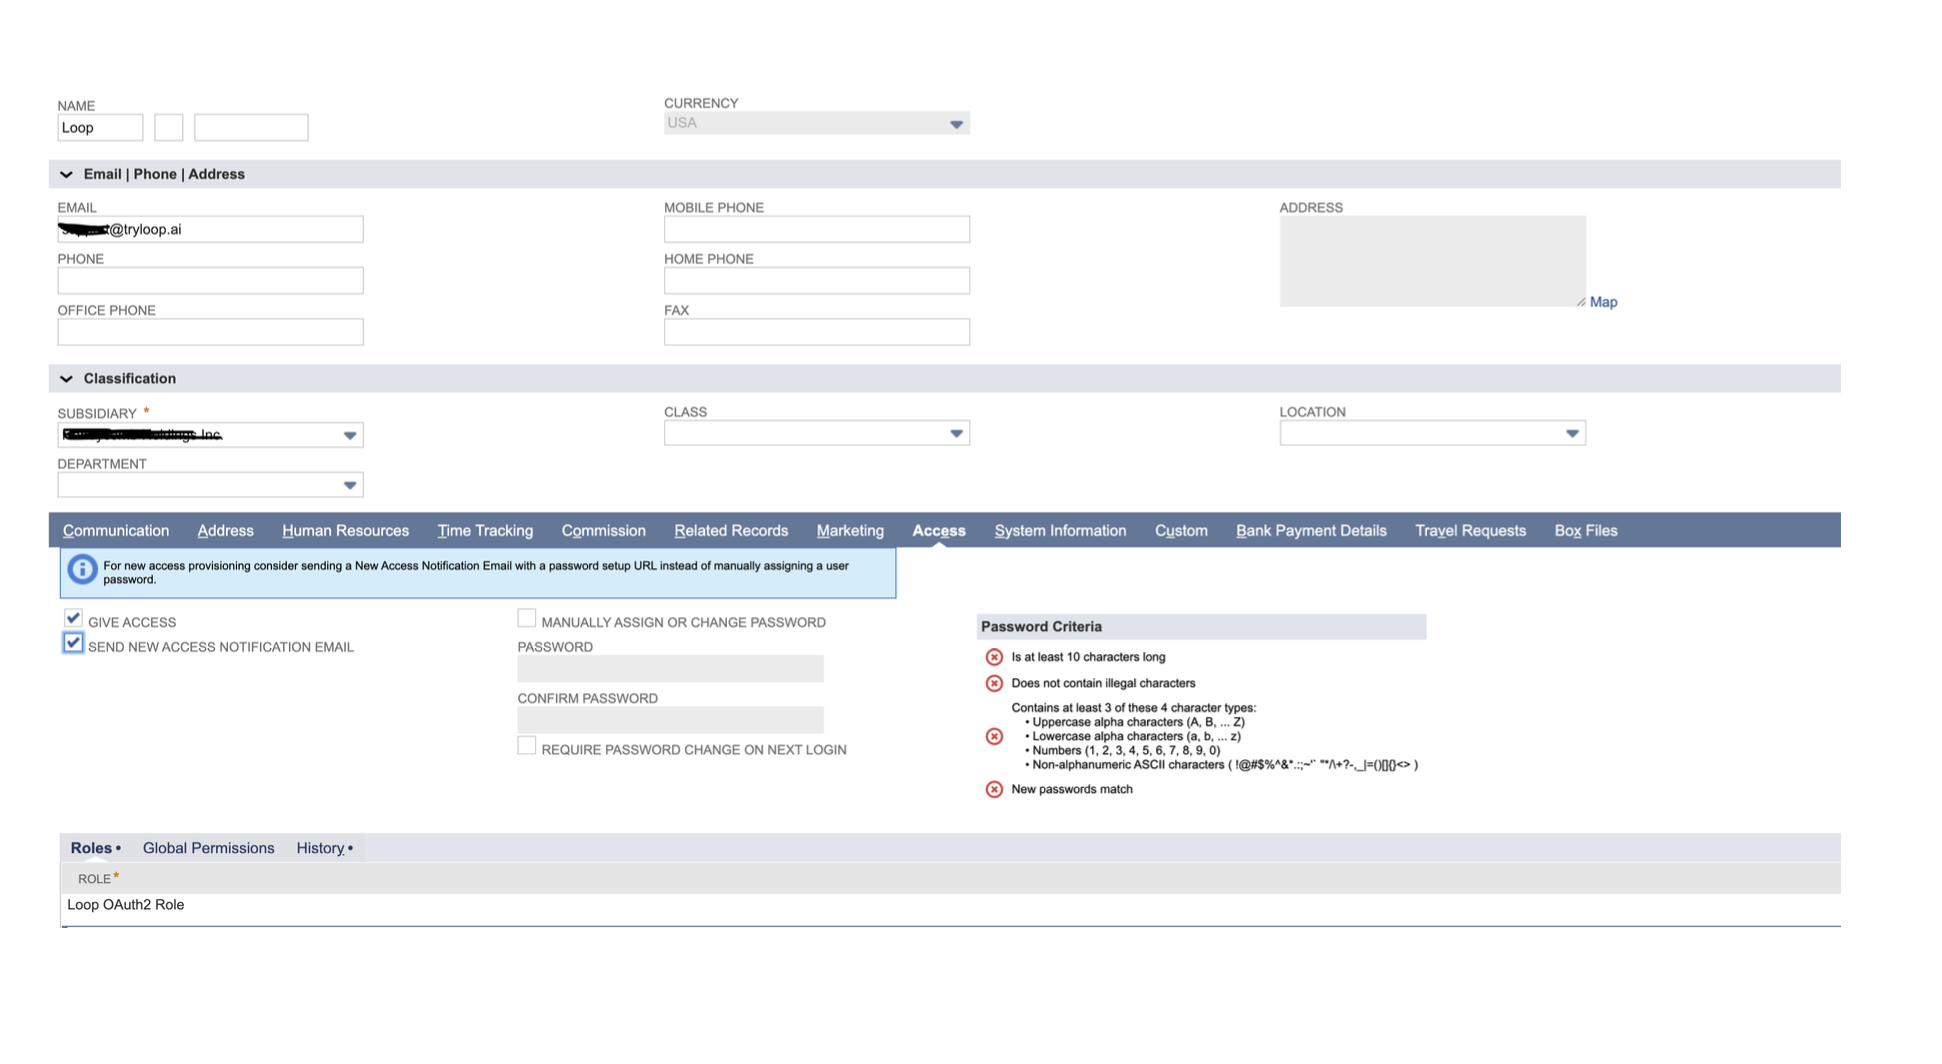
- Go to Lists → Employees → New
- Enter employee details:
- Name:
Loop(or any name you prefer) - Email: your email or a shared team email
- Subsidiary: select the subsidiary for which you want to give access for
- Name:
- Click the Access tab
- Check Give Access and Send new access notification email
- Under Roles, select the role you created in Step 3 (e.g.
Loop OAuth2 Role) and click Add - Click Save
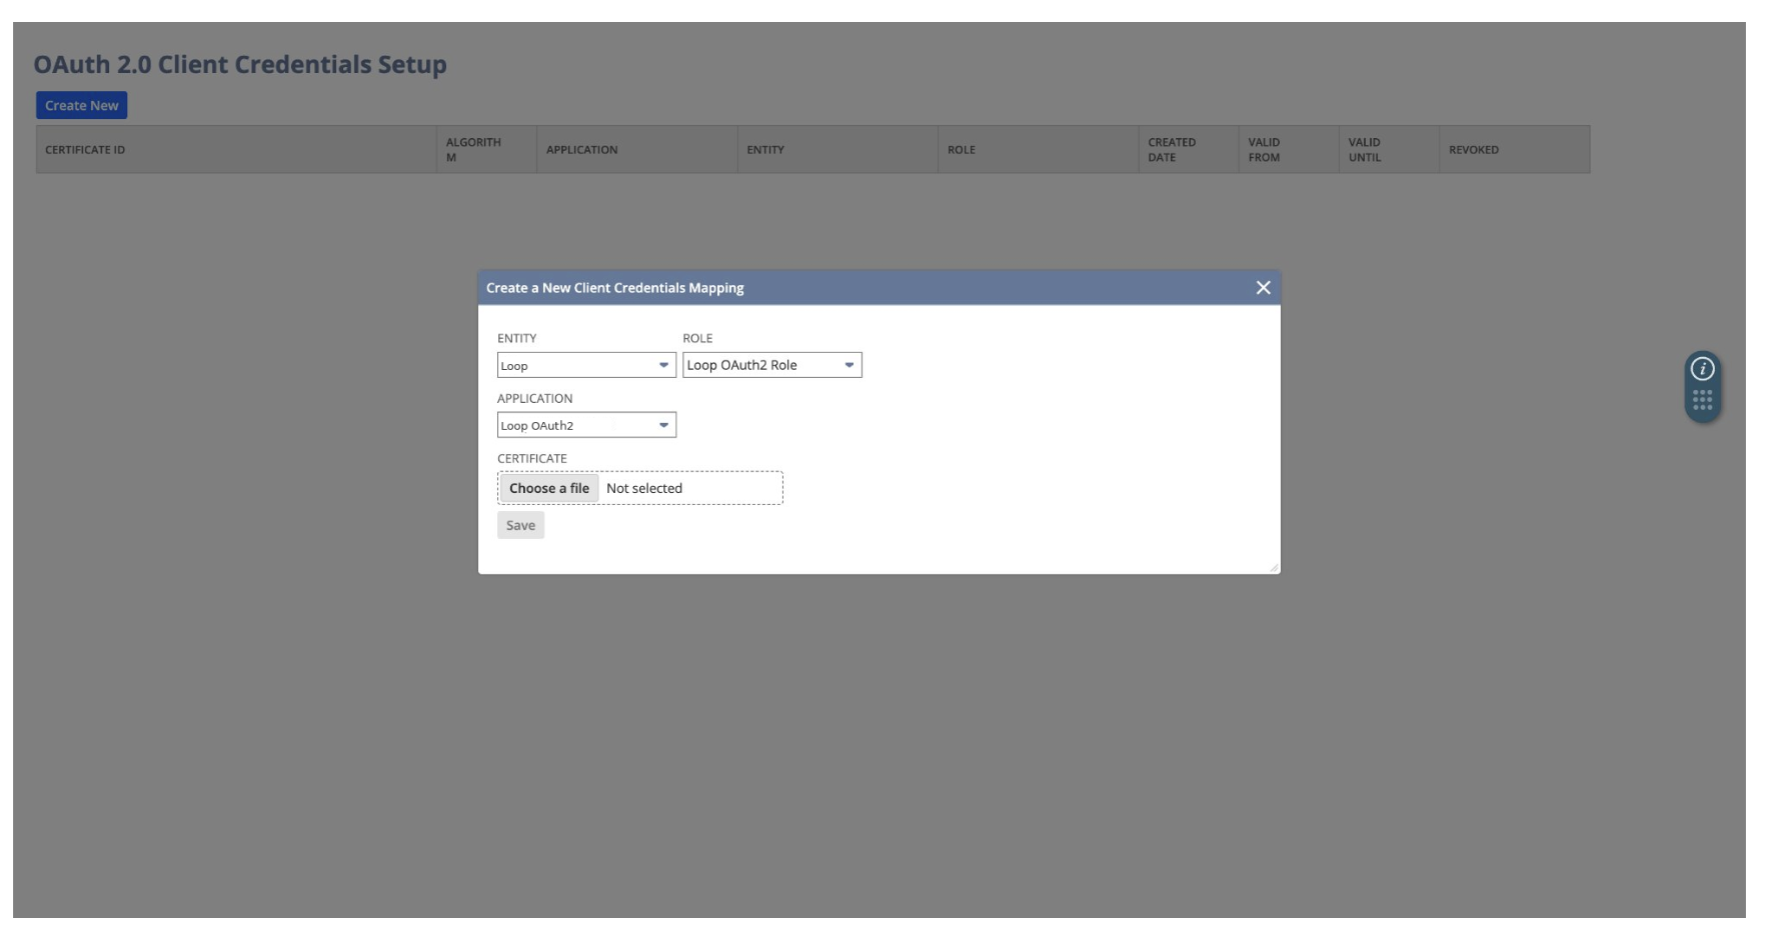
Step 5: Upload Loop's Certificate
- Go to Setup → Integration → OAuth 2.0 Client Credentials (M2M) Setup
- Click Create New
- In the popup window:
- Entity — select the user you created in Step 4 (e.g.
Loop) - Role — select the role you created in Step 3 (e.g.
Loop OAuth2 Role) - Application — select the integration you created in Step 2 (e.g.
Loop OAuth2)
- Entity — select the user you created in Step 4 (e.g.
- Click Choose a file and upload the certificate file (
loop_netsuite_certificate.pem) from the link: https://drive.google.com/file/d/1cCcyGg6tnnZ4npbwKX5RG8Guo00ks_bw/view?usp=drive_link - Click Save
- The Certificate ID will appear in the list. Copy it and save it.
 Important: Do not revoke this certificate mapping. If you need to change the user or role later, simply create a new mapping with the same certificate file — you don't need a new file from Loop.
Completing the Setup in Loop
Step 1: Log in to Loop
Log in to Loop using your username and password at app.loopkitchen.com
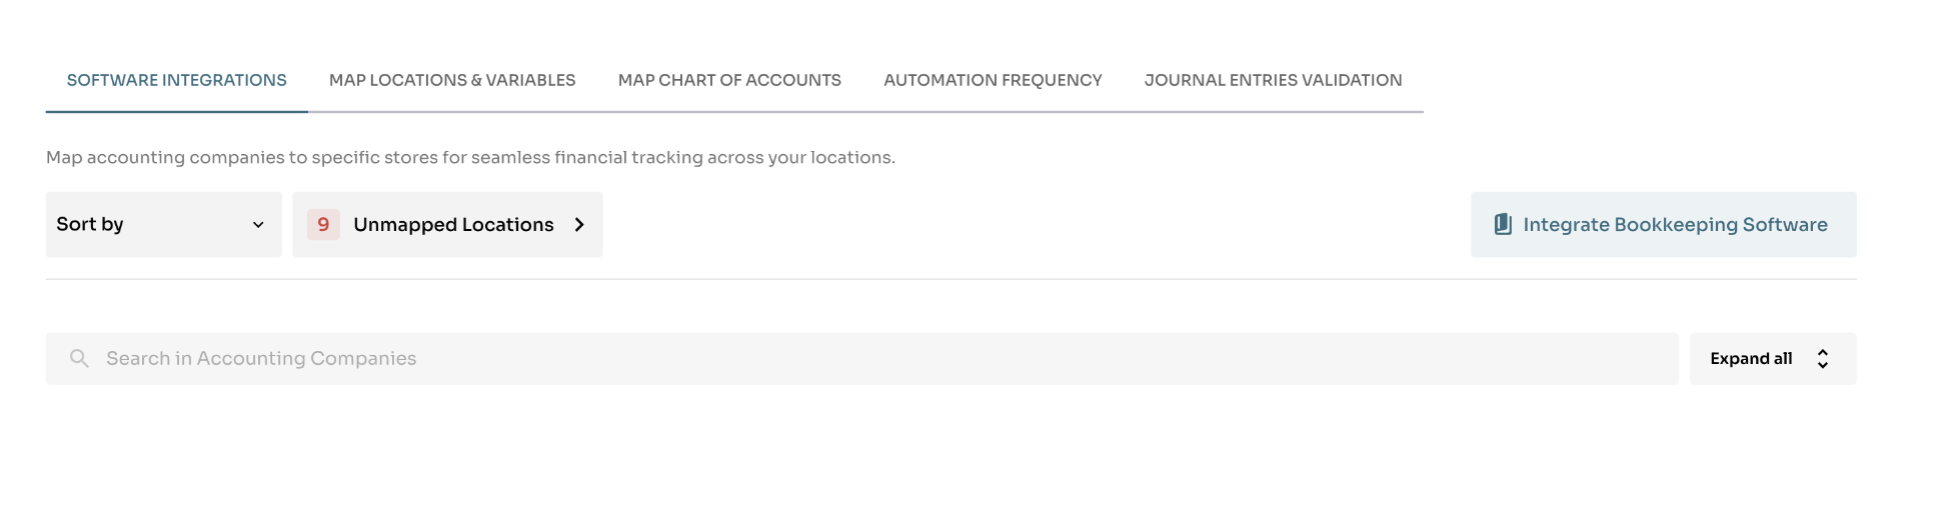
Step 2: Navigate to Software Integration
Click on Journal Entry Automation → Software Integration, and click Integrate Bookkeeping Software in the top right.
Step 3: Select NetSuite
Click on the NetSuite logo to start the integration.
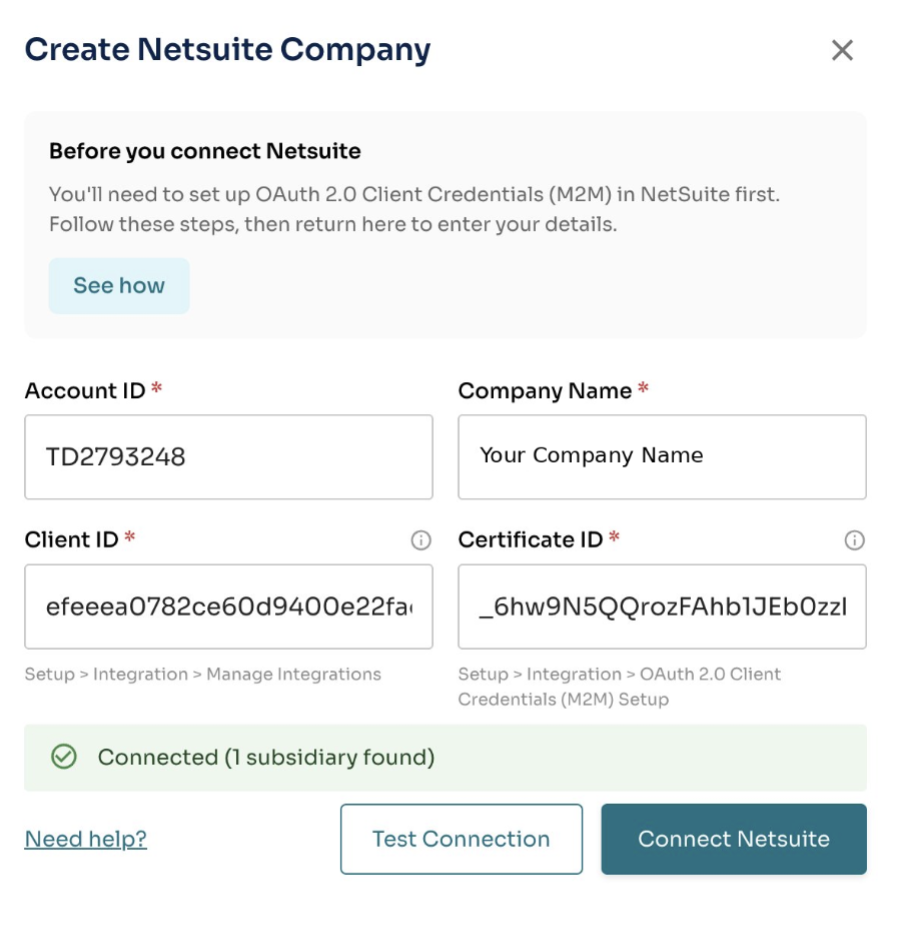
Step 4: Enter Your Details
Enter the three details you generated from NetSuite:
- Account ID (from Step 1)
- Client ID (from Step 2)
- Certificate ID (from Step 5)
You can enter any Company Name you'd like — this is just a label to help you identify the integration in Loop.
Click Test Connection to verify everything is working, then click Connect.
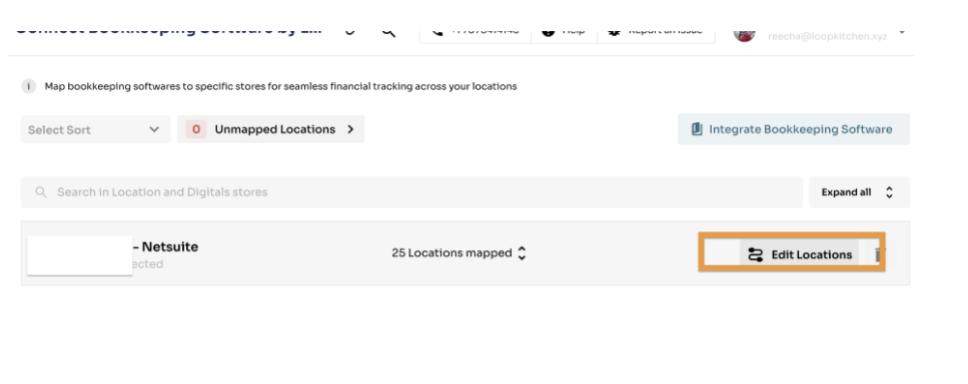
Step 5: Map Locations
After connecting, click Edit Locations and map each Loop location to the corresponding NetSuite location from the dropdown. Click Save Mapping to finalize the setup.
Troubleshooting
"Test Connection" fails
- Make sure REST Web Services is enabled in NetSuite (Prerequisites section above)
- Make sure OAuth 2.0 is enabled in NetSuite (Prerequisites section above)
- Make sure the REST Web Services scope is checked on the Integration Record (Step 2)
- Make sure the role has SuiteAnalytics Workbook (Edit) under Reports permissions (Step 3)
- Make sure Web Services Only Role is unchecked on the role (Step 3)
Updated role permissions but still getting errors?
- NetSuite takes a few minutes to apply role permission changes. Wait 5–10 minutes and try again.
- You do not need to re-upload the certificate or create a new mapping.
Lost the Client ID?
- Go to Setup → Integration → Manage Integrations, click Edit on the Loop OAuth2 integration
- Click Reset Credentials to generate a new Client ID
- Enter the new Client ID in Loop
Need to change the user or role?
- Go to Setup → Integration → OAuth 2.0 Client Credentials (M2M) Setup
- Click Create New and select the new user/role with the same certificate file
- Enter the new Certificate ID in Loop
Quick Reference
| Value | Where to find it |
|---|---|
| Account ID | Setup → Company → Company Information |
| Client ID | Shown when saving the Integration Record (Step 2) |
| Certificate ID | OAuth 2.0 M2M Setup page (Step 5) |
If you encounter any issues or have further questions, please contact us at support@tryloop.ai