
A cadence tells Loop when to push your journal entries into your bookkeeping software automatically. Once it's set, Loop handles the schedule, notifies the people you choose, and keeps your books on time — setup takes under five minutes.
1. Create a cadence
From the AUTOMATION FREQUENCY tab, click + Add Automation Frequency in the top-right. A 4-step wizard opens.
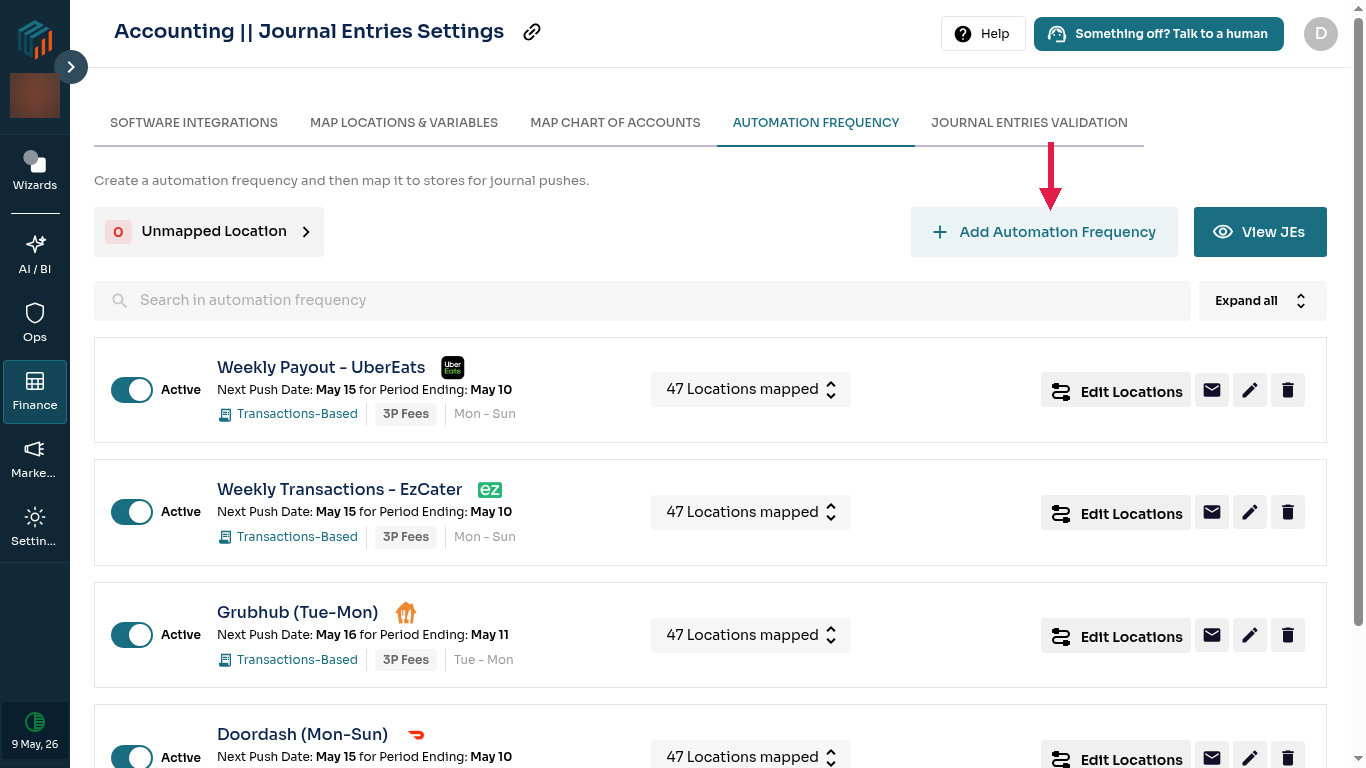
The AUTOMATION FREQUENCY tab inside Journal Entries Settings.
Step 1 — Select Marketplace
Pick the marketplace this cadence will cover (DoorDash, ezCater, Grubhub, Uber Eats), then set:
- Journal Entry Type — the JE template Loop will use (e.g. 3P Fees).
- How Journal Entries are generated:
- Payouts-Based — JEs are created when a payout lands from the marketplace. Use this for cash-basis accounting.
- Transactions-Based — JEs are created on your sales cycle, regardless of when the payout is received. Use this for accrual accounting.
- Payout cycle preview — after scrolling down, the calendar on the right shows your projected JE Push Date, Payout Date, and Sales period so you can see exactly when entries will land before you save.
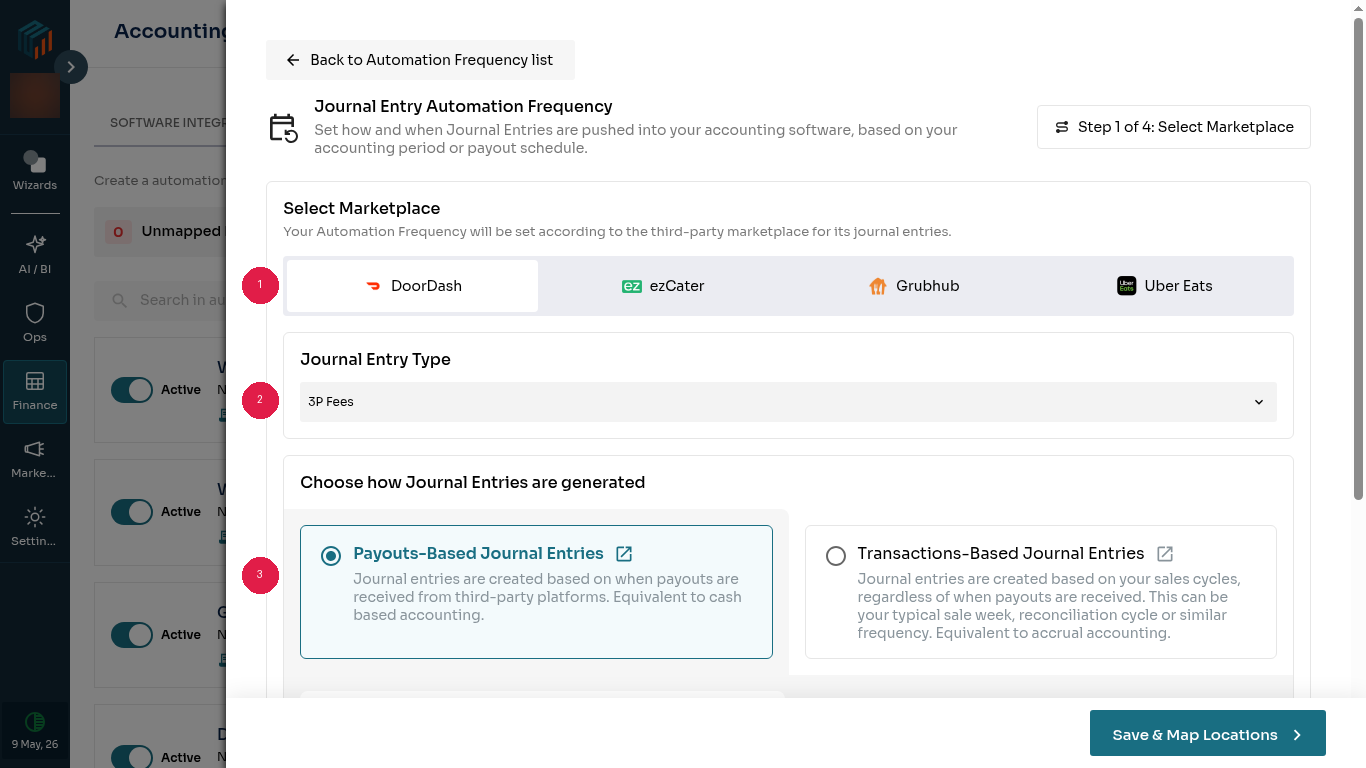
Step 1 — marketplace, JE Type, and how journal entries are generated.
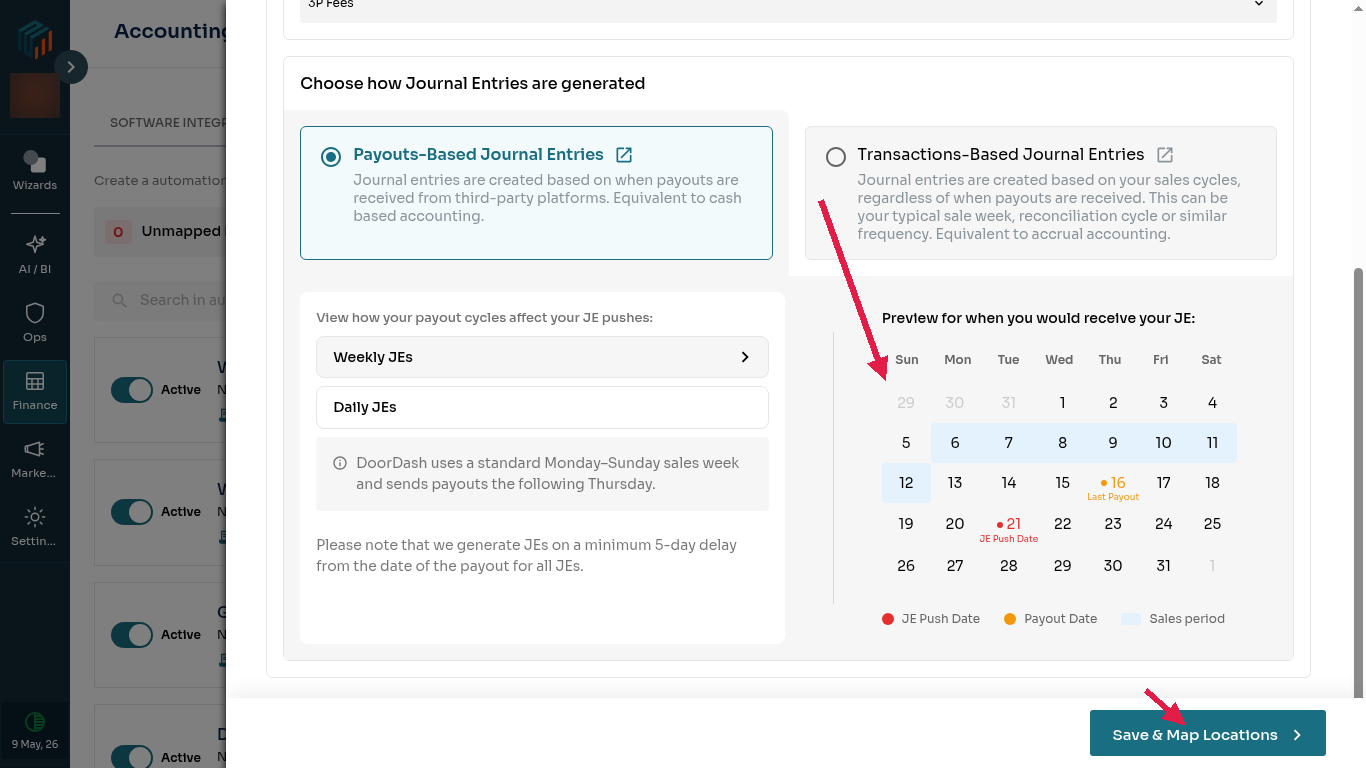
Scroll down on Step 1 to see the calendar preview of when your JEs will be pushed.
Click Save & Map Locations. A confirmation modal opens listing every marketplace you selected — uncheck any you don't want a cadence for, then click Continue.
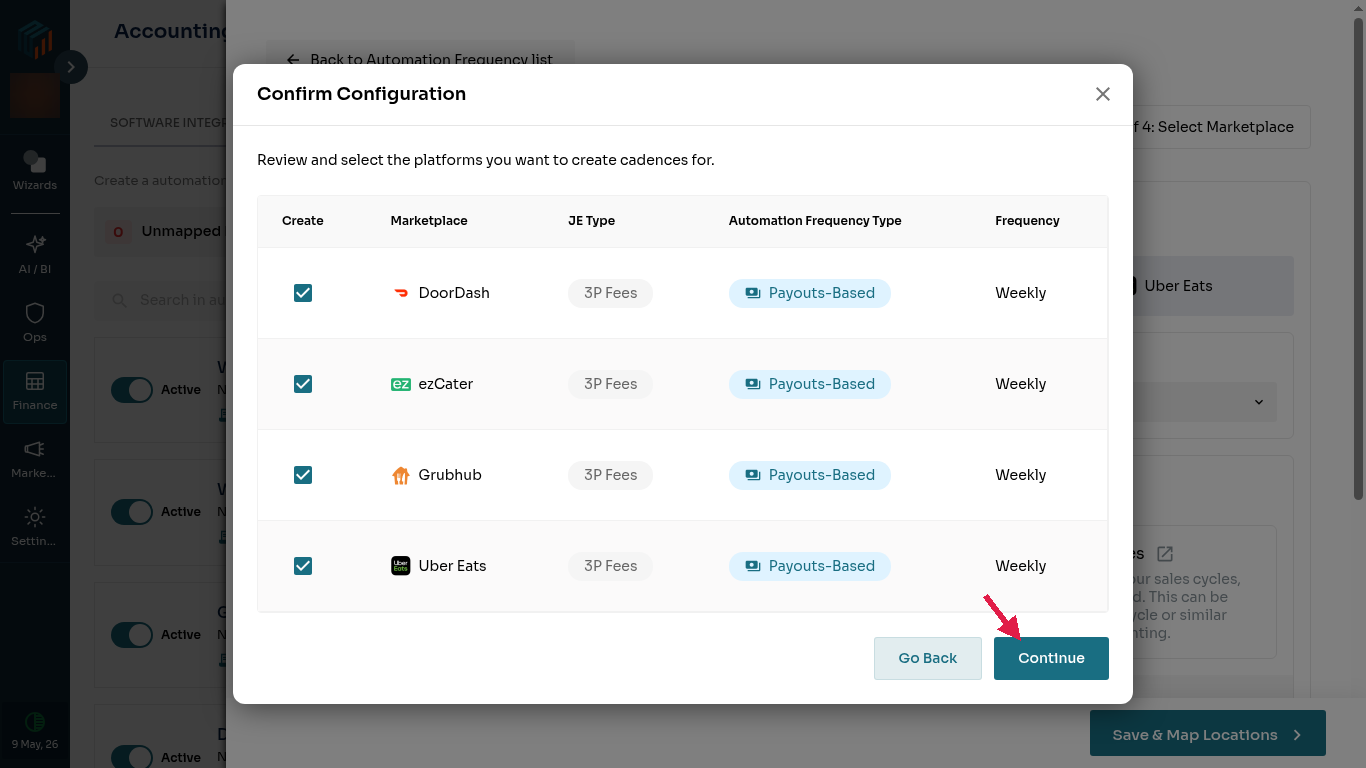
The Confirm Configuration modal — review marketplaces before proceeding.
Step 2 — Select Locations
Map the locations this cadence should cover. Use the company filter at the top if your org has multiple brands, the search box to filter by store name, or Select All to map every visible location.
Each location can only be mapped to one active cadence per marketplace; unmapped locations stay available for a future cadence.
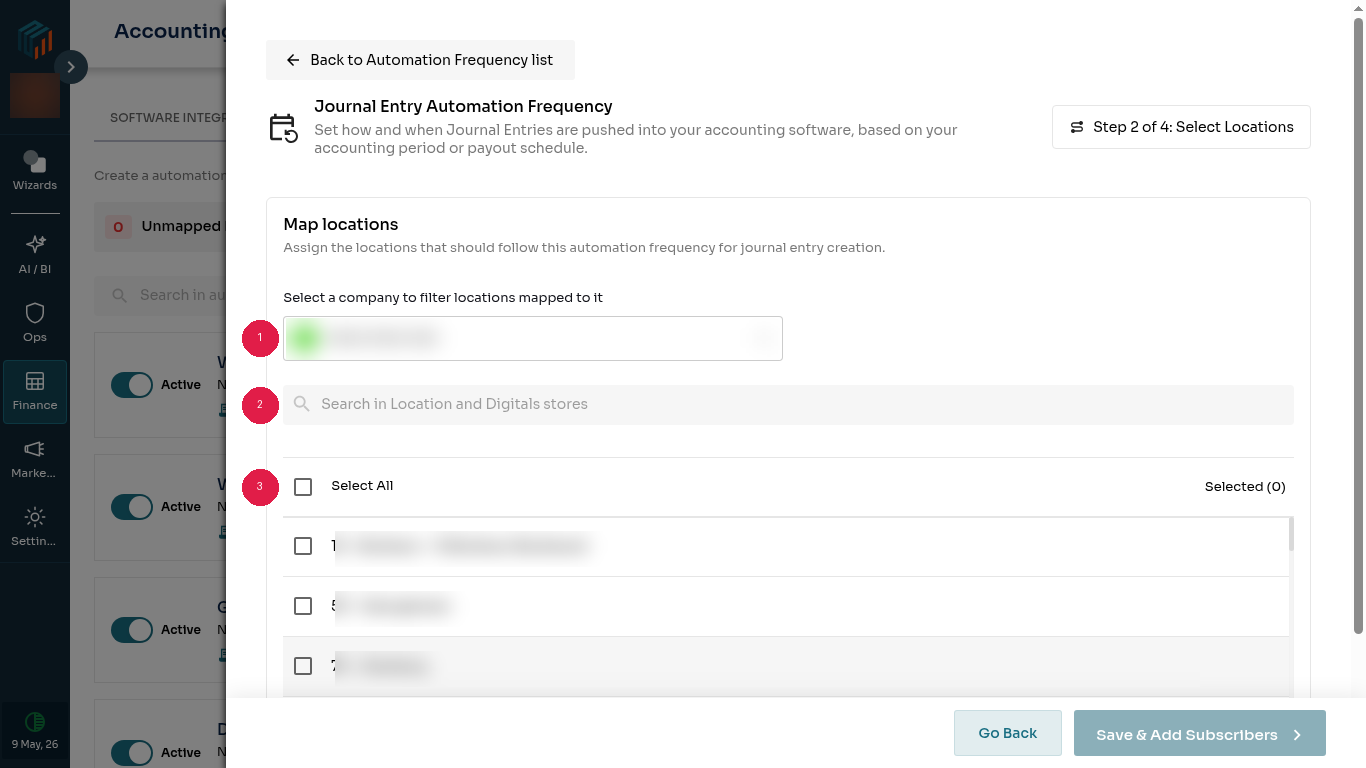
Step 2 — pick the locations covered by this cadence.
Step 3 — Add Subscribers
Subscribers get an email every time this cadence pushes — on both success and failure. Search existing Loop users or enter any email address directly.
Keep the list tight: add the people who would action a failed push (typically the controller, AP/AR lead, finance ops), not the whole org.
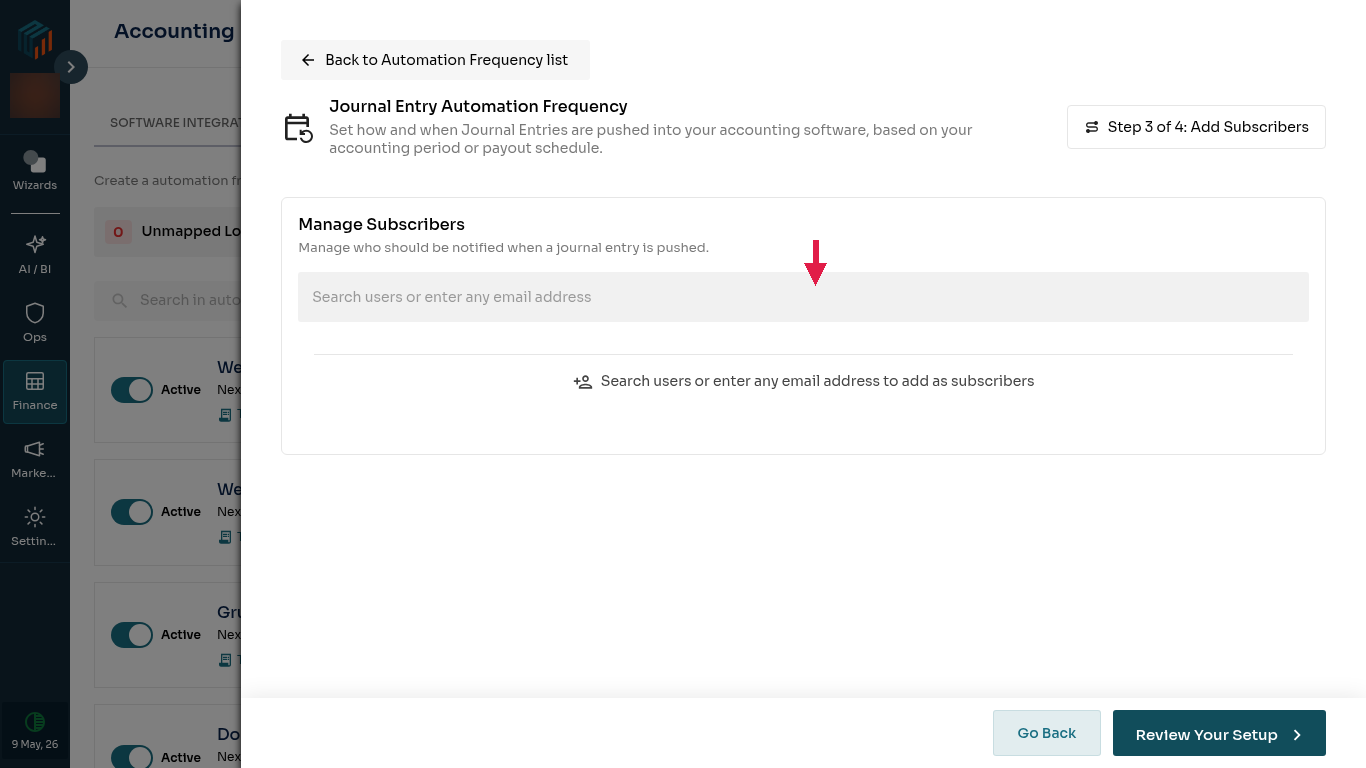
Step 3 — add the people who should be notified after each push.
Step 4 — Review Setup
The final step shows a summary table for every marketplace in the cadence: JE Type, Automation Frequency Type, Frequency, Locations mapped, and Subscribers. Use Back to Edit to fix anything, or Finalize Setup to save.
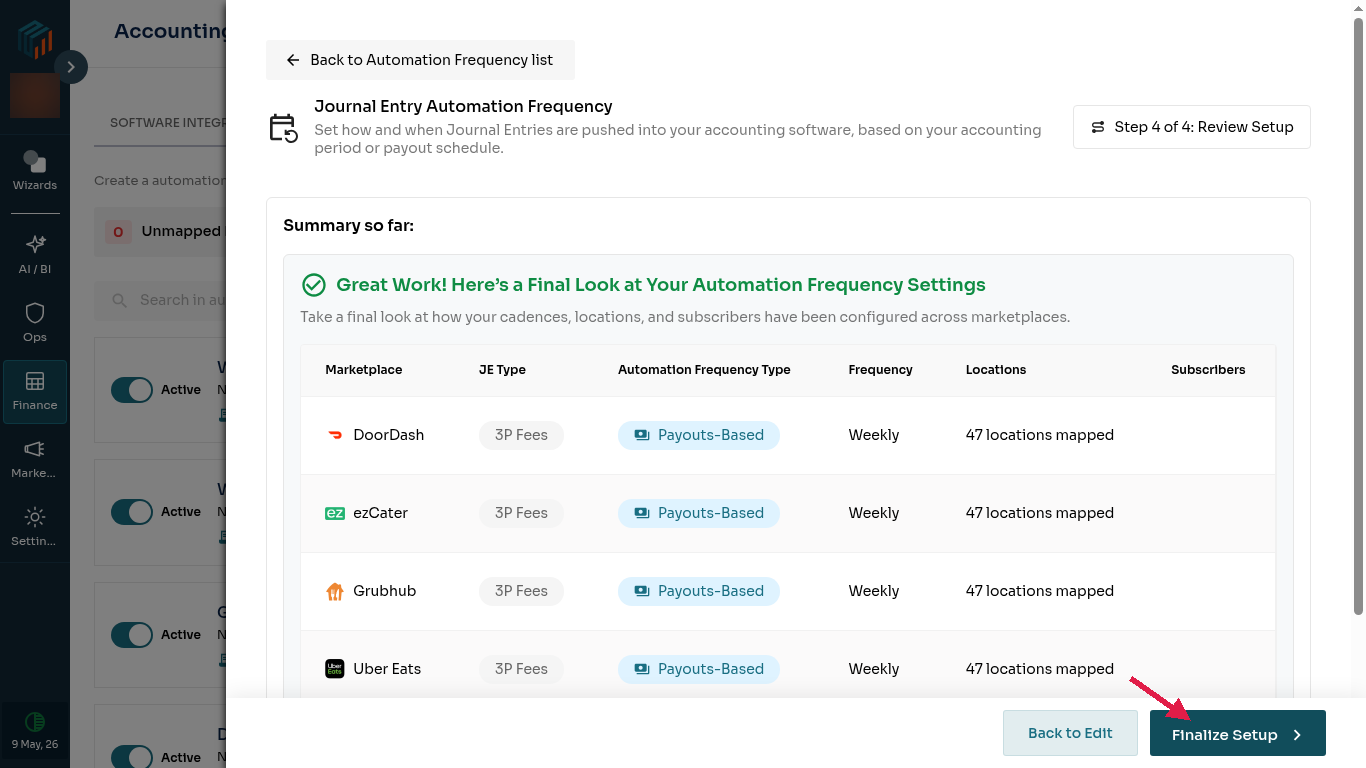
Step 4 — confirm and finalize.
2. Manage an existing cadence
Every cadence row in the AUTOMATION FREQUENCY tab has quick actions on the right:
- Active toggle — pause or resume the cadence. Paused cadences stop pushing but keep their location mappings, so resuming requires no re-work.
- Edit Locations (or Map Locations if none yet) — re-opens the Map locations panel from Step 2 of the wizard.
- Manage Subscribers (mail icon) — edit the notification list.
- Edit Automation Frequency (pencil icon) — re-opens the wizard to change name, JE Type, generation method, or frequency.
- Delete (trash icon) — removes the cadence and its location mappings. If you re-create it later, you'll need to re-map.
3. Verify a push happened
- Open Journal Entries Settings → JOURNAL ENTRIES VALIDATION to preview the entries Loop will push for the next period before they hit your books.
- Open Finance → Accounting → Journal Entries to see push history and per-location status.
- Subscribers receive an email after each scheduled push with the result (entries pushed, any failures).
Need help?
If you have any questions or need help configuring a cadence, please reach out to support@tryloop.ai.